In this comprehensive tutorial, we'll walk through building a Perplexity-style application using LangGraph, Tavily, and CopilotKit.
At its core, the application uses CoAgents to process user requests, performing multiple searches and streaming both status updates and results to the frontend in real-time. This approach puts users in control, allowing them to guide and refine the search process as it unfolds.
Prerequisites
To fully understand this tutorial, you need to have a basic understanding of React or Next.js.
We'll also make use of the following:
CopilotKit: A framework for building production-ready AI Agents and Copilots.
LangGraph: A framework for creating and deploying AI agents. It also helps to define the control flows and actions to be performed by the agent.
Tavily AI: A search engine that enables AI agents to conduct research and access real-time knowledge within the application.
Shad Cn UI: Provides a collection of re-usable UI components within the application.
How to create AI agents with LangGraph and CopilotKit
In this section, you'll learn how to create an AI agent using LangGraph and CopilotKit.
First, clone the CopilotKit CoAgents starter repository. The ui directory contains the frontend for the Next.js application, and the agent directory holds the CoAgent for the application.
Inside the agent directory, install the project dependencies using Poetry.
cd agent
poetry install
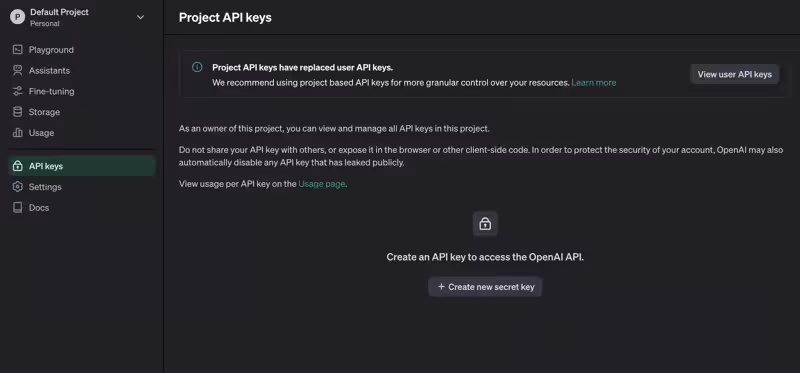
Create a .env file within the agent folder and copy your OpenAI and Tavily AI API keys into the file:
Copy the code snippet below into the agent.py file:
  """
This is the main entry point for the AI.
It defines the workflow graph and the entry point for the agent.
"""
# pylint: disable=line-too-long, unused-import
from langgraph.graph import StateGraph, END
from langgraph.checkpoint.memory import MemorySaver

from ai_researcher.state import AgentState
from ai_researcher.steps import steps_node
from ai_researcher.search import search_node
from ai_researcher.summarize import summarize_node
from ai_researcher.extract import extract_node

def route(state):
    """Route to research nodes."""
    if not state.get("steps", None):
        return END

    current_step = next((step for step in state["steps"] if step["status"] == "pending"), None)

    if not current_step:
        return "summarize_node"

    if current_step["type"] == "search":
        return "search_node"

    raise ValueError(f"Unknown step type: {current_step['type']}")

# Define a new graph
workflow = StateGraph(AgentState)
workflow.add_node("steps_node", steps_node)
workflow.add_node("search_node", search_node)
workflow.add_node("summarize_node", summarize_node)
workflow.add_node("extract_node", extract_node)
# Chatbot
workflow.set_entry_point("steps_node")

workflow.add_conditional_edges(
    "steps_node",
    route,
    ["summarize_node", "search_node", END]
)

workflow.add_edge("search_node", "extract_node")

workflow.add_conditional_edges(
    "extract_node",
    route,
    ["summarize_node", "search_node"]
)

workflow.add_edge("summarize_node", END)

memory = MemorySaver()
graph = workflow.compile(checkpointer=memory)
The code snippet above defines the LangGraph agent workflow. LangGraph Studio helps visualize the steps_node, then searches for the results, summarizes them, and extracts the key points.
Update the demo.py file with the code snippet below:
  """Demo"""

import os
from dotenv import load_dotenv
load_dotenv()

from fastapi import FastAPI
import uvicorn
from copilotkit.integrations.fastapi import add_fastapi_endpoint
from copilotkit import CopilotKitSDK, LangGraphAgent
from ai_researcher.agent import graph

app = FastAPI()
sdk = CopilotKitSDK(
    agents=[
        LangGraphAgent(
            name="ai_researcher",
            description="Search agent.",
            graph=graph,
        )
    ],
)

add_fastapi_endpoint(app, sdk, "/copilotkit")

# add new route for health check
@app.get("/health")
def health():
    """Health check."""
    return {"status": "ok"}

def main():
    """Run the uvicorn server."""
    port = int(os.getenv("PORT", "8000"))
    uvicorn.run("ai_researcher.demo:app", host="0.0.0.0", port=port, reload=True)
The code snippet above creates a FastAPI endpoint that hosts the LangGraph agent and connects it to the CopilotKit SDK.
You can copy the remaining code for creating the CoAgent from the GitHub repository. In the following sections, you'll learn how to build the user interface for the Perplexity clone and handle search requests using CopilotKit.
Building the application interface with Next.js
In this section, I'll walk you through the process of building the user interface for the application.
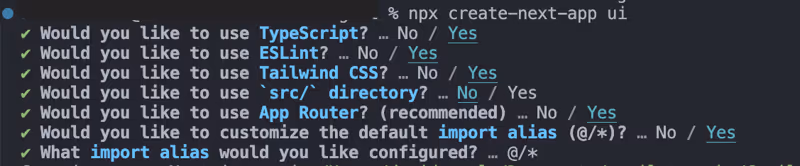
First, create a Next.js Typescript project by running the code snippet below:
  # 👉🏻 Navigate into the ui folder
npx create-next-app ./
Install the ShadCn UI library to the newly created project by running the code snippet below:
npx shadcn@latest init
Next, create a components folder at the root of the Next.js project, then copy the ui folder from this GitHub repository into that folder. Shadcn allows you to easily add various components to your application by installing them via the command line.
In addition to the Shadcn components, you'll need to create a few components representing different parts of the application interface. Run the following code snippet inside the components folder to add these components to the Next.js project:
Copy the code snippet below into the app/page.tsx file:
  "use client";

import { ResearchWrapper } from "@/components/ResearchWrapper";
import { ModelSelectorProvider, useModelSelectorContext } from "@/lib/model-selector-provider";
import { ResearchProvider } from "@/lib/research-provider";
import { CopilotKit } from "@copilotkit/react-core";
import "@copilotkit/react-ui/styles.css";

export default function ModelSelectorWrapper() {

  return (
      <CopilotKit runtimeUrl={useLgc ? "/api/copilotkit-lgc" : "/api/copilotkit"} agent="ai_researcher">
        <ResearchProvider>
          <ResearchWrapper />
        </ResearchProvider>
      </CopilotKit>
  );
}
In the code snippet above, ResearchProvider is a custom React context provider that shares the user's search query and results, making them accessible to all components within the application. The ResearchWrapper component contains the core application elements and manages the UI.
Create a lib folder containing a research-provider.tsx file at the root of the Next.js project and copy the code below into the file:
The ResearchWrapper component renders the HomeView component as the default view and displays the ResultView when a search query is provided. The useResearchContext hook enables us to acccess the researchQuery state and update the view accordingly.
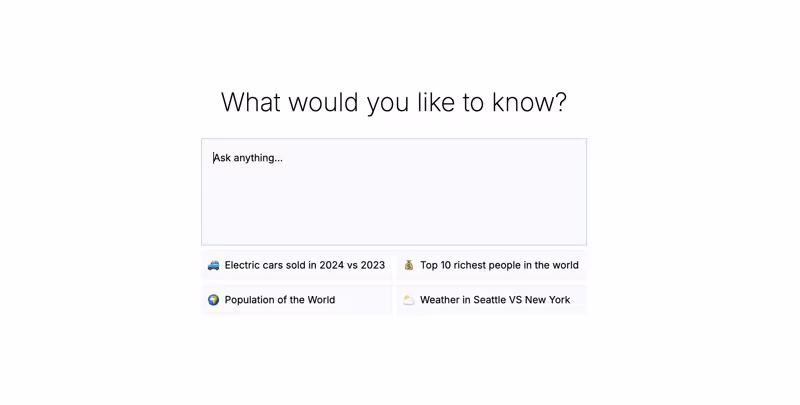
Finally, update the HomeView component to render the application home page interface.
How to Connect your CoAgent to a Next.js Application
In this section, you'll learn how to connect the CopilotKit CoAgent to your Next.js application to enable users to perform search operations within the application.
Install the following CopilotKit packages and the OpenAI Node.js SDK. The CopilotKit packages allow the co-agent to interact with the React state values and make decisions within the application.
Create an api folder within the Next.js app folder. Inside the api folder, create a copilotkit directory containing a route.ts file. This will create an API endpoint (/api/copilotkit) that connects the frontend application to the CopilotKit CoAgent.
  cd app
mkdir api && cd api
mkdir copilotkit && cd copilotkit
touch route.ts
Copy the code snippet below into the api/copilotkit/route.ts file:
  mport { NextRequest } from "next/server";
import {
  CopilotRuntime,
  OpenAIAdapter,
  copilotRuntimeNextJSAppRouterEndpoint,
} from "@copilotkit/runtime";
import OpenAI from "openai";

//👇🏻 initializes OpenAI as the adapter
const openai = new OpenAI();
const serviceAdapter = new OpenAIAdapter({ openai } as any);

//👇🏻 connects the CopilotKit runtime to the CoAgent
const runtime = new CopilotRuntime({
  remoteEndpoints: [
    {
      url: process.env.REMOTE_ACTION_URL || "http://localhost:8000/copilotkit",
    },
  ],
});

export const POST = async (req: NextRequest) => {
  const { handleRequest } = copilotRuntimeNextJSAppRouterEndpoint({
    runtime,
    serviceAdapter,
    endpoint: "/api/copilotkit",
  });

  return handleRequest(req);
};
The code snippet above sets up the CopilotKit runtime at the /api/copilotkit API endpoint, allowing CopilotKit to process user requests through the AI co-agent.
Finally, update the app/page.tsx by wrapping the entire application with the CopilotKit component which provides the copilot context to all application components.
The CopilotKit component wraps the entire application and accepts two props - runtimeUrl and agent. The runtimeUrl is the backend API route that hosts the AI agent and agent is the name of the agent performing the action.
Accepting requests and streaming responses to the frontend
To enable CopilotKit to access and process user inputs, it provides the useCoAgent hook, which allows access to the agent's state from anywhere within the application.
For example, the code snippet below demonstrates how to use the useCoAgent hook. The state variable allows access to the agent's current state, setState is used to modify the state, and the run function executes instructions using the agent. The start and stop functions initiate and halt the agent's execution.
Next, you can stream the search results to the the ResultsView by accessing the state variable within the useCoAgent hook. Copy the code snippet below into the ResultsView component.
The code snippet above retrieves the search results from the agent's state and streams them to the frontend using the useCoAgent hook. The search results are returned in markdown format and passed into the AnswerMarkdown component, which renders the content on the page.
Finally, copy the code snippet below into the AnswerMarkdown component. This will render the markdown content as formatted text using the React Markdown library.
Congratulations! You've completed the project for this tutorial. For a detailed overview of this project, you can watch our recent webinar, where we demonstrate these features in action.
LLM intelligence is most effective when it works alongside human intelligence, and CopilotKit CoAgents allows you to integrate AI agents, copilots, and various types of assistants into your software applications in just a few minutes.
If you need to build an AI product or integrate AI agents into your software applications, you should consider CopilotKit.
The source code for this tutorial is available on GitHub here:
Thank you for reading!
Subscribe to the newsletter
Get notified of the latest news and updates.
Thanks for subscribing! Stay tuned for updates and offers.


.png)
%20Using%20A2A%20%2B%20AG-UI%20(8).png)
.png)
